Painted Cabinets Kitchen: Your Ultimate DIY Photography and Styling Guide
Transform your kitchen with stunning painted cabinets that will make your space pop and your Instagram followers swoon!
Why Painted Cabinets Are a Game-Changer
Let’s cut to the chase – painted cabinets are more than just a trend. They’re a total kitchen transformation weapon that can:
- Breathe new life into a tired kitchen
- Cost a fraction of a full renovation
- Allow you to express your personal style
- Increase your home’s aesthetic appeal

Essential Tools You’ll Need
Camera Gear
- High-quality smartphone or DSLR camera
- Tripod for stability
- Natural light or softbox lighting kit
Styling Essentials
- Neutral props (cutting boards, ceramics)
- Fresh herbs or flowers
- Clean, crisp kitchen towels
- Vintage or modern kitchenware

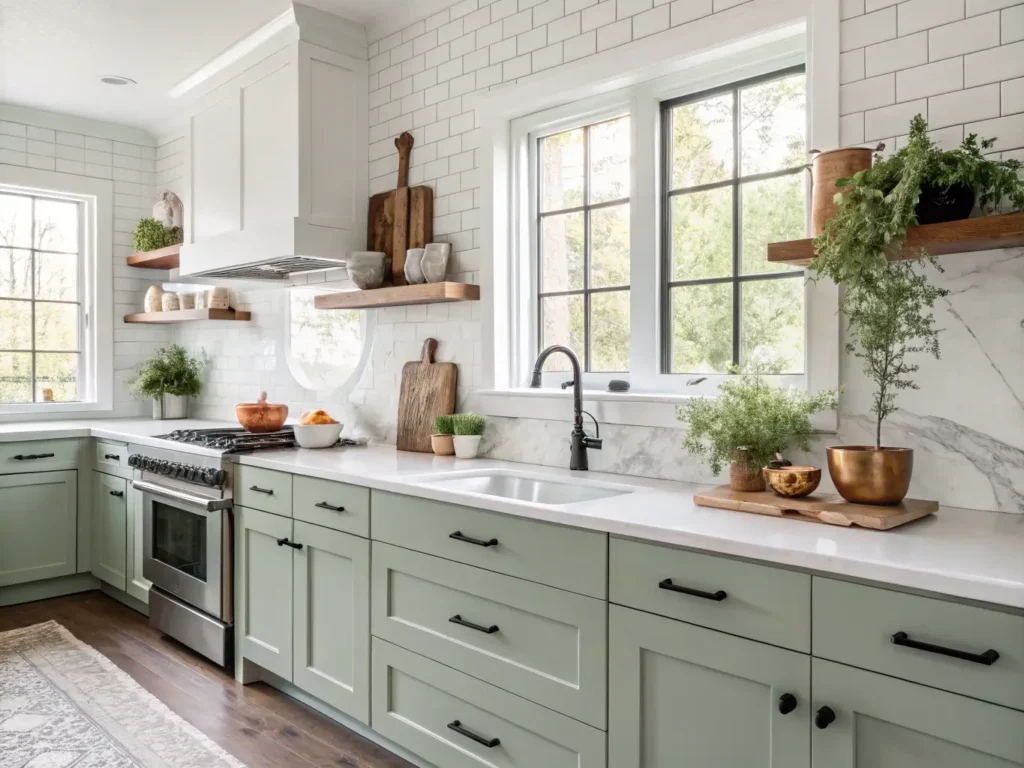
Choosing Your Perfect Color Palette
Top Cabinet Color Trends
- Sage Green: Brings nature indoors
- Deep Navy: Adds dramatic sophistication
- Warm White: Creates timeless elegance
- Soft Gray: Provides modern neutrality

Step-by-Step Painting Process
Preparation is Key
- Remove cabinet doors and hardware
- Sand surfaces thoroughly
- Use primer designed for kitchen cabinets
- Choose high-quality, moisture-resistant paint
- Apply thin, even coats
- Allow proper drying time between coats
Pro Painting Tips
- Use foam rollers for smooth finish
- Invest in quality painter’s tape
- Work in a dust-free environment
- Consider professional spray painting for perfect results

Photography Magic: Capturing Your Painted Cabinets
Lighting Secrets
- Shoot during golden hour (early morning/late afternoon)
- Use diffused natural light
- Avoid harsh overhead lighting
- Experiment with side lighting to highlight textures
Composition Rules
- Follow the rule of thirds
- Create depth with layered props
- Use negative space strategically
- Highlight unique cabinet details

Styling Your Newly Painted Kitchen
Complementary Decor Elements
- Brass or matte black hardware
- Contrasting countertop materials
- Statement lighting fixtures
- Textural elements like woven baskets

Budget Breakdown
Cost Expectations
- DIY Paint Project: $200-$500
- Professional Painting: $1,000-$3,000
- New Hardware: $50-$300
- Styling Props: $100-$300

Common Mistakes to Avoid
- Skipping surface preparation
- Using cheap paint
- Rushing the painting process
- Neglecting proper ventilation
- Forgetting to seal painted surfaces
Final Thoughts
Painted cabinets aren’t just a makeover – they’re a statement. With careful planning, quality materials, and a bit of creativity, you can transform your kitchen from blah to brilliant.
Your Action Plan
- Choose your color
- Gather supplies
- Prep your space
- Paint with patience
- Style and photograph your masterpiece
Remember: Every brushstroke is a step towards your dream kitchen!