The Basics: What You Need to Know About Fireplace Built-In Projects
Let’s start with some hard facts about what you’re getting into:
Time Investment:
- Photography (for before/after): 2-3 hours
- Styling and arranging: 4-6 hours
- Total project planning to completion: 8-10 hours (not including construction)
Space Requirements:
- Ideal room size: 12×18 ft living room with central fireplace
- You’ll need at least 2-3 feet on either side of your fireplace for standard built-ins
Skill Level & Budget:
- DIY Difficulty: Moderate (basic carpentry skills required)
- Budget Options:
- Budget-Friendly ($500-$1,500): IKEA Billy Bookcase hack
- Mid-Range ($2,000-$5,000): Semi-custom built-ins
- High-End ($5,000+): Custom floor-to-ceiling designs with premium finishes
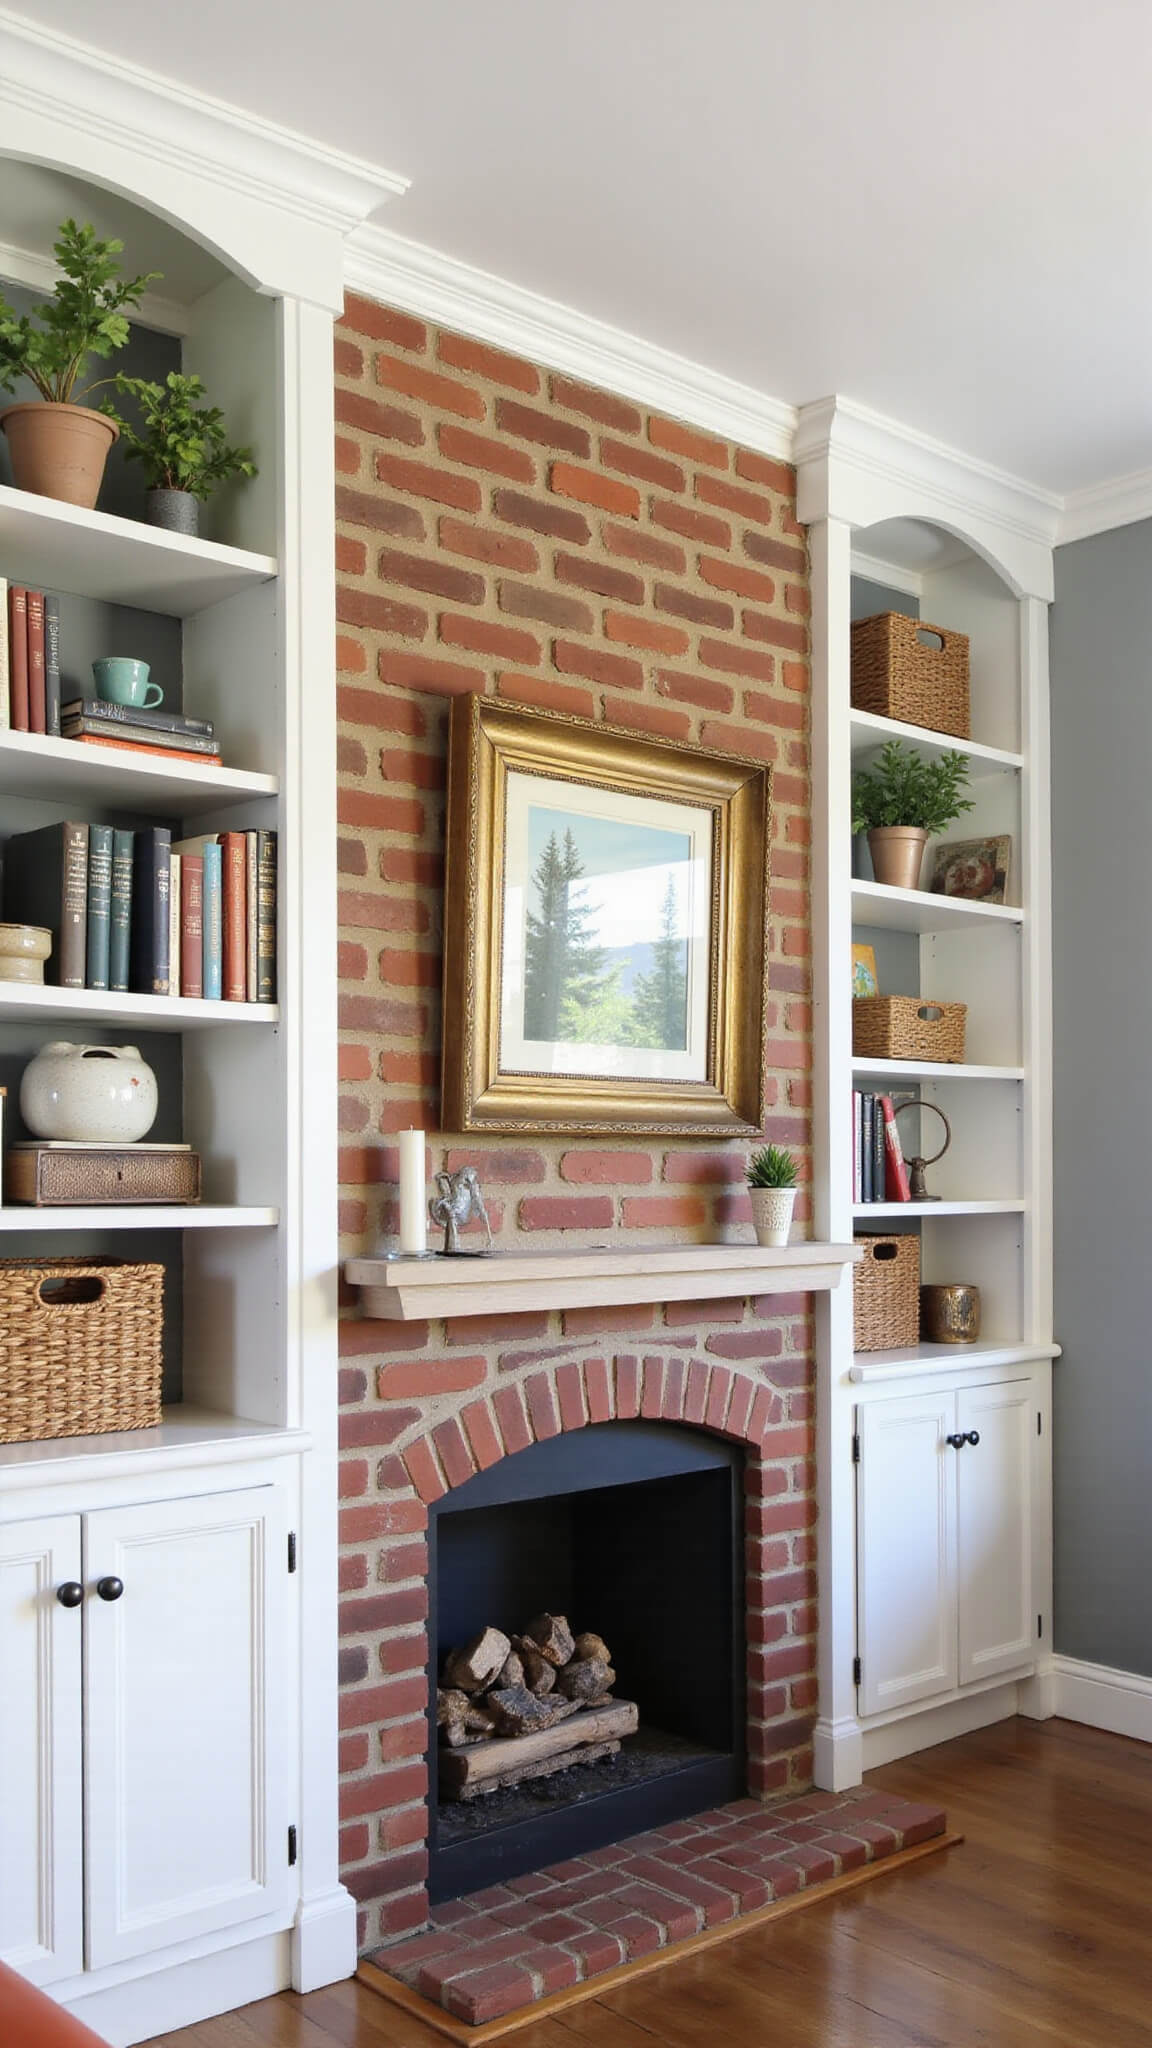
Choosing Your Style: Finding the Perfect Look
Your fireplace built-ins should complement your home’s overall aesthetic. Here are the most popular styles I’ve installed for clients:
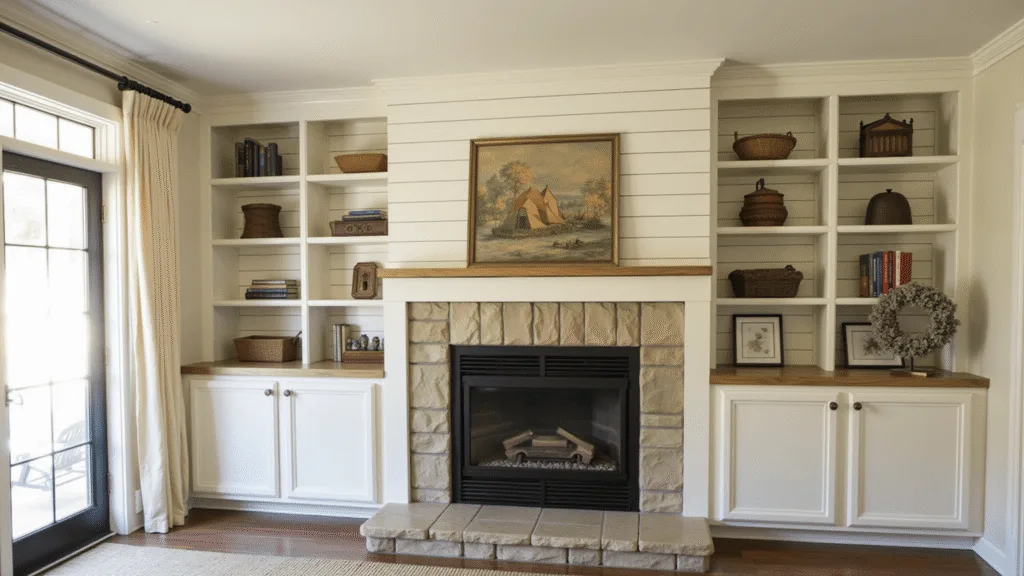
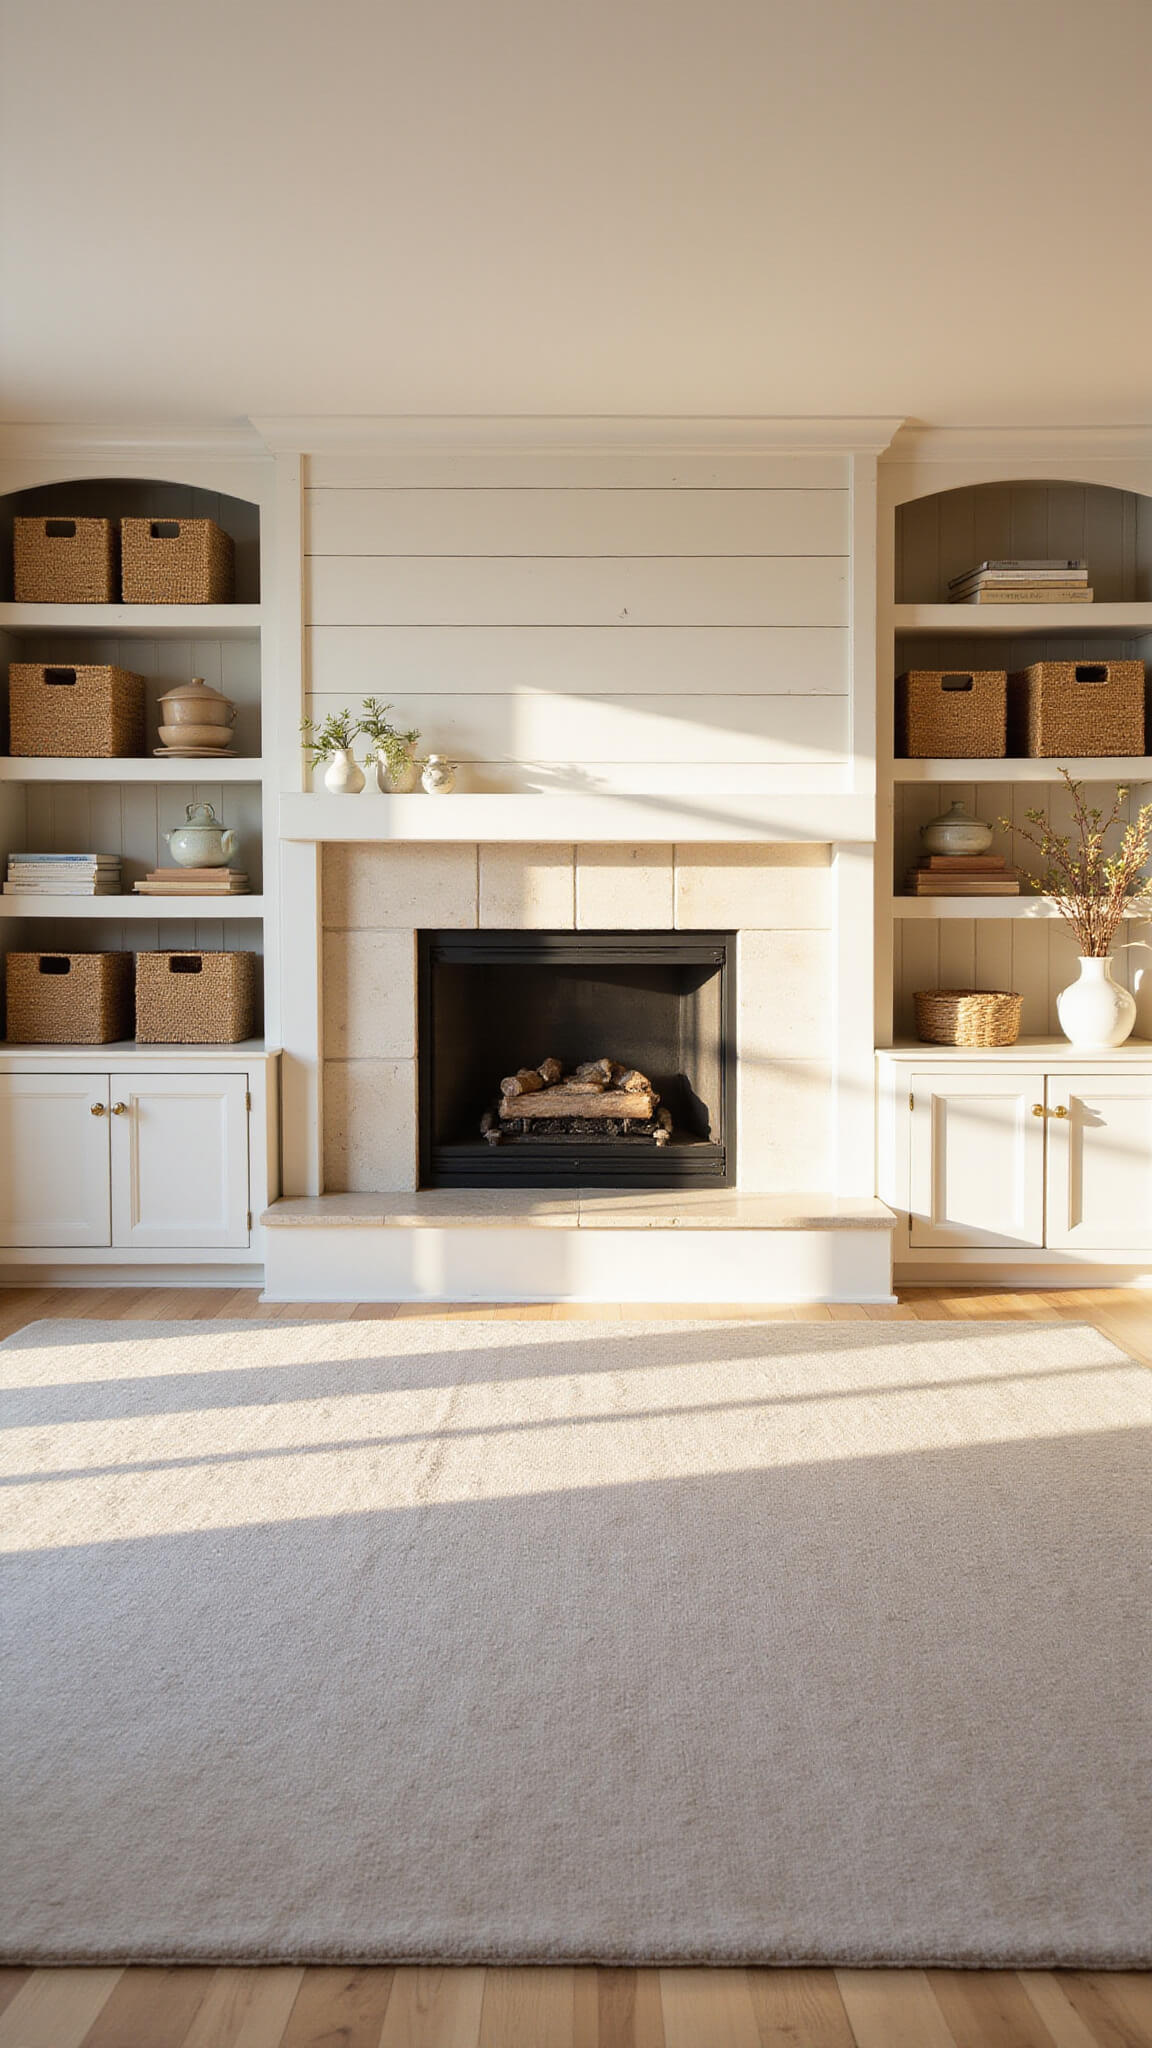
Farmhouse Style Built-Ins
- Shiplap backing
- Distressed white or cream finishes
- Open shelving with baskets
- Natural wood accents
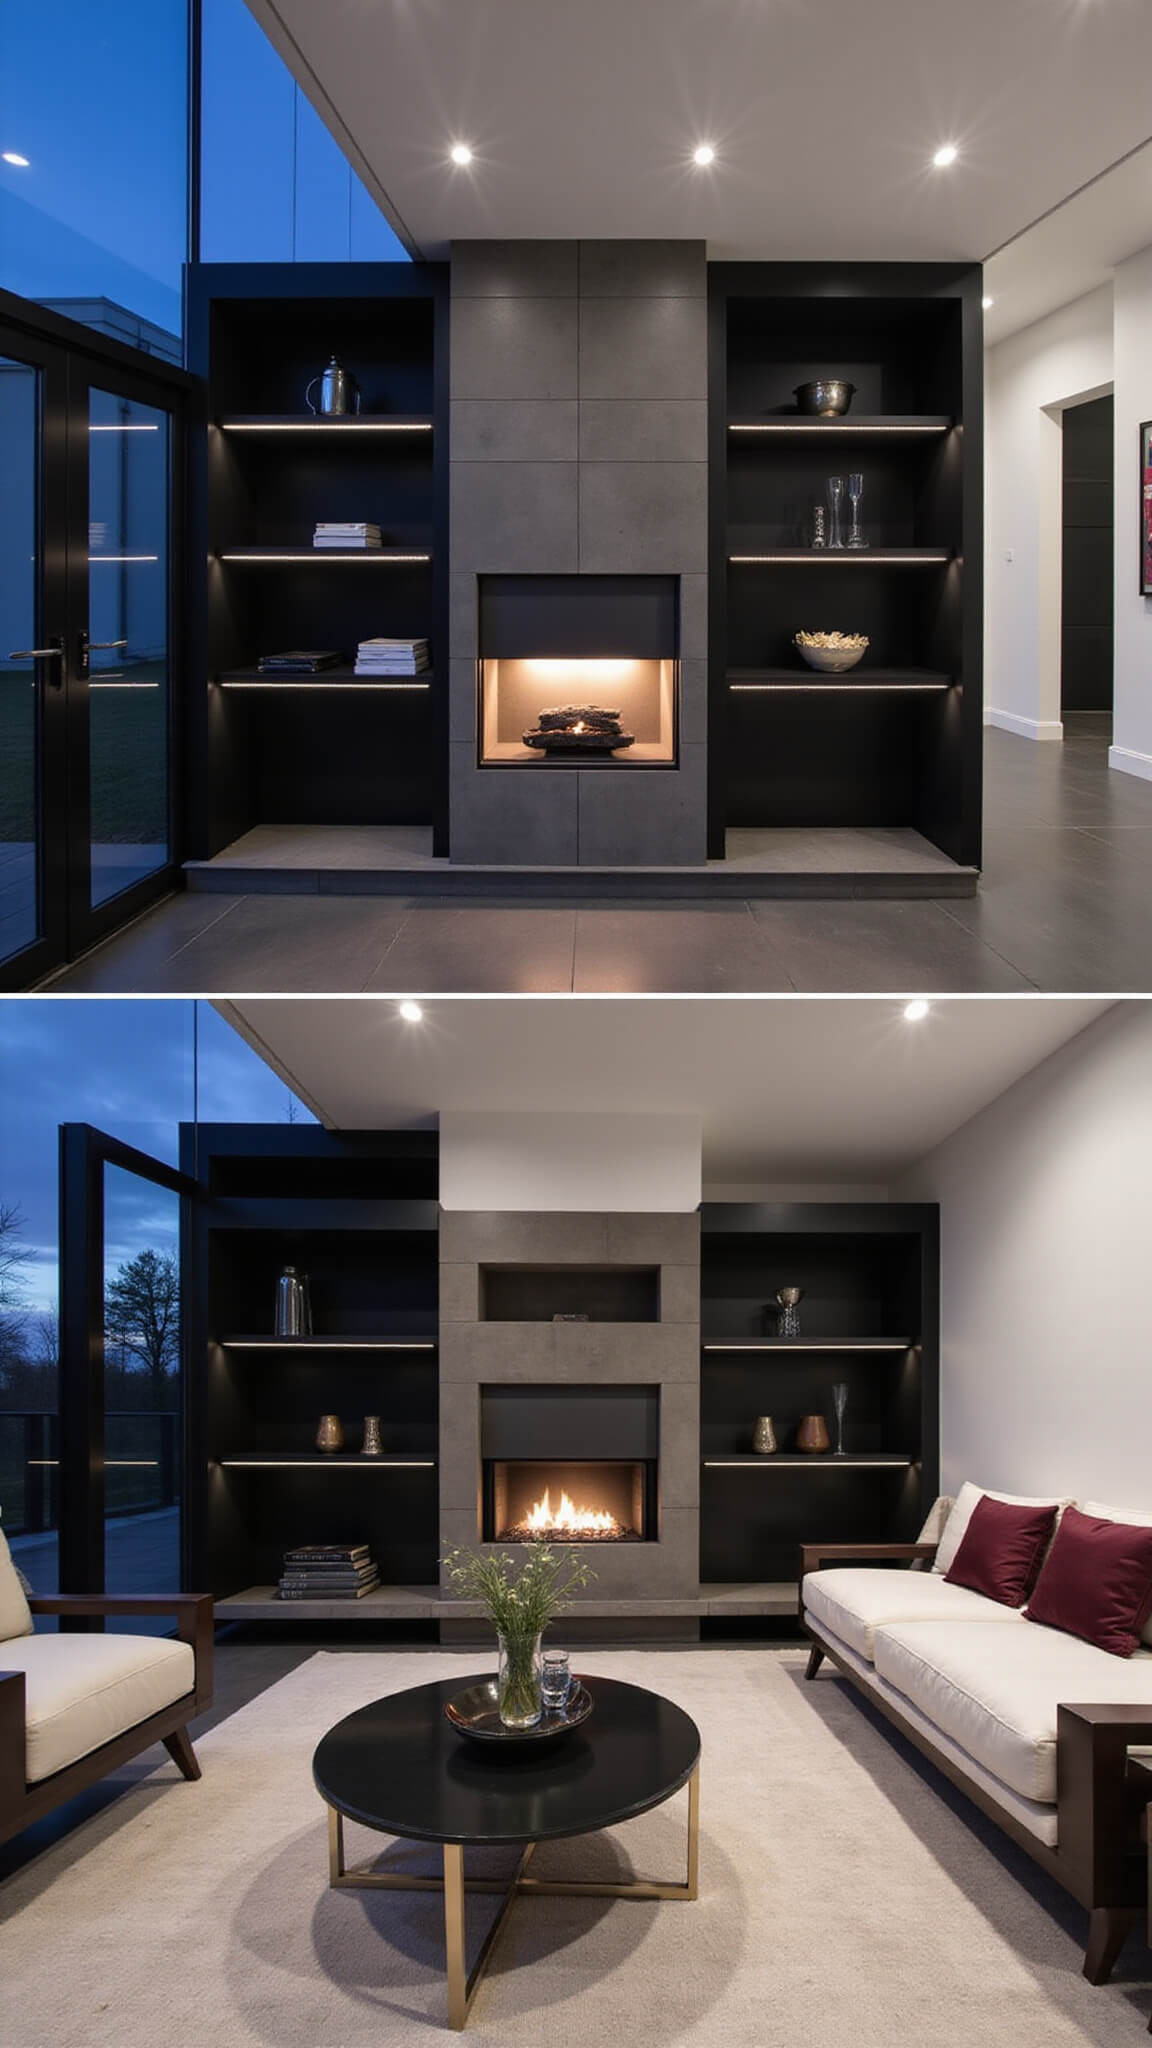
Modern Built-Ins
- Clean lines and minimal ornamentation
- High-contrast colors (black cabinets with white shelves)
- Hidden storage behind sleek cabinet doors
- Floating shelves
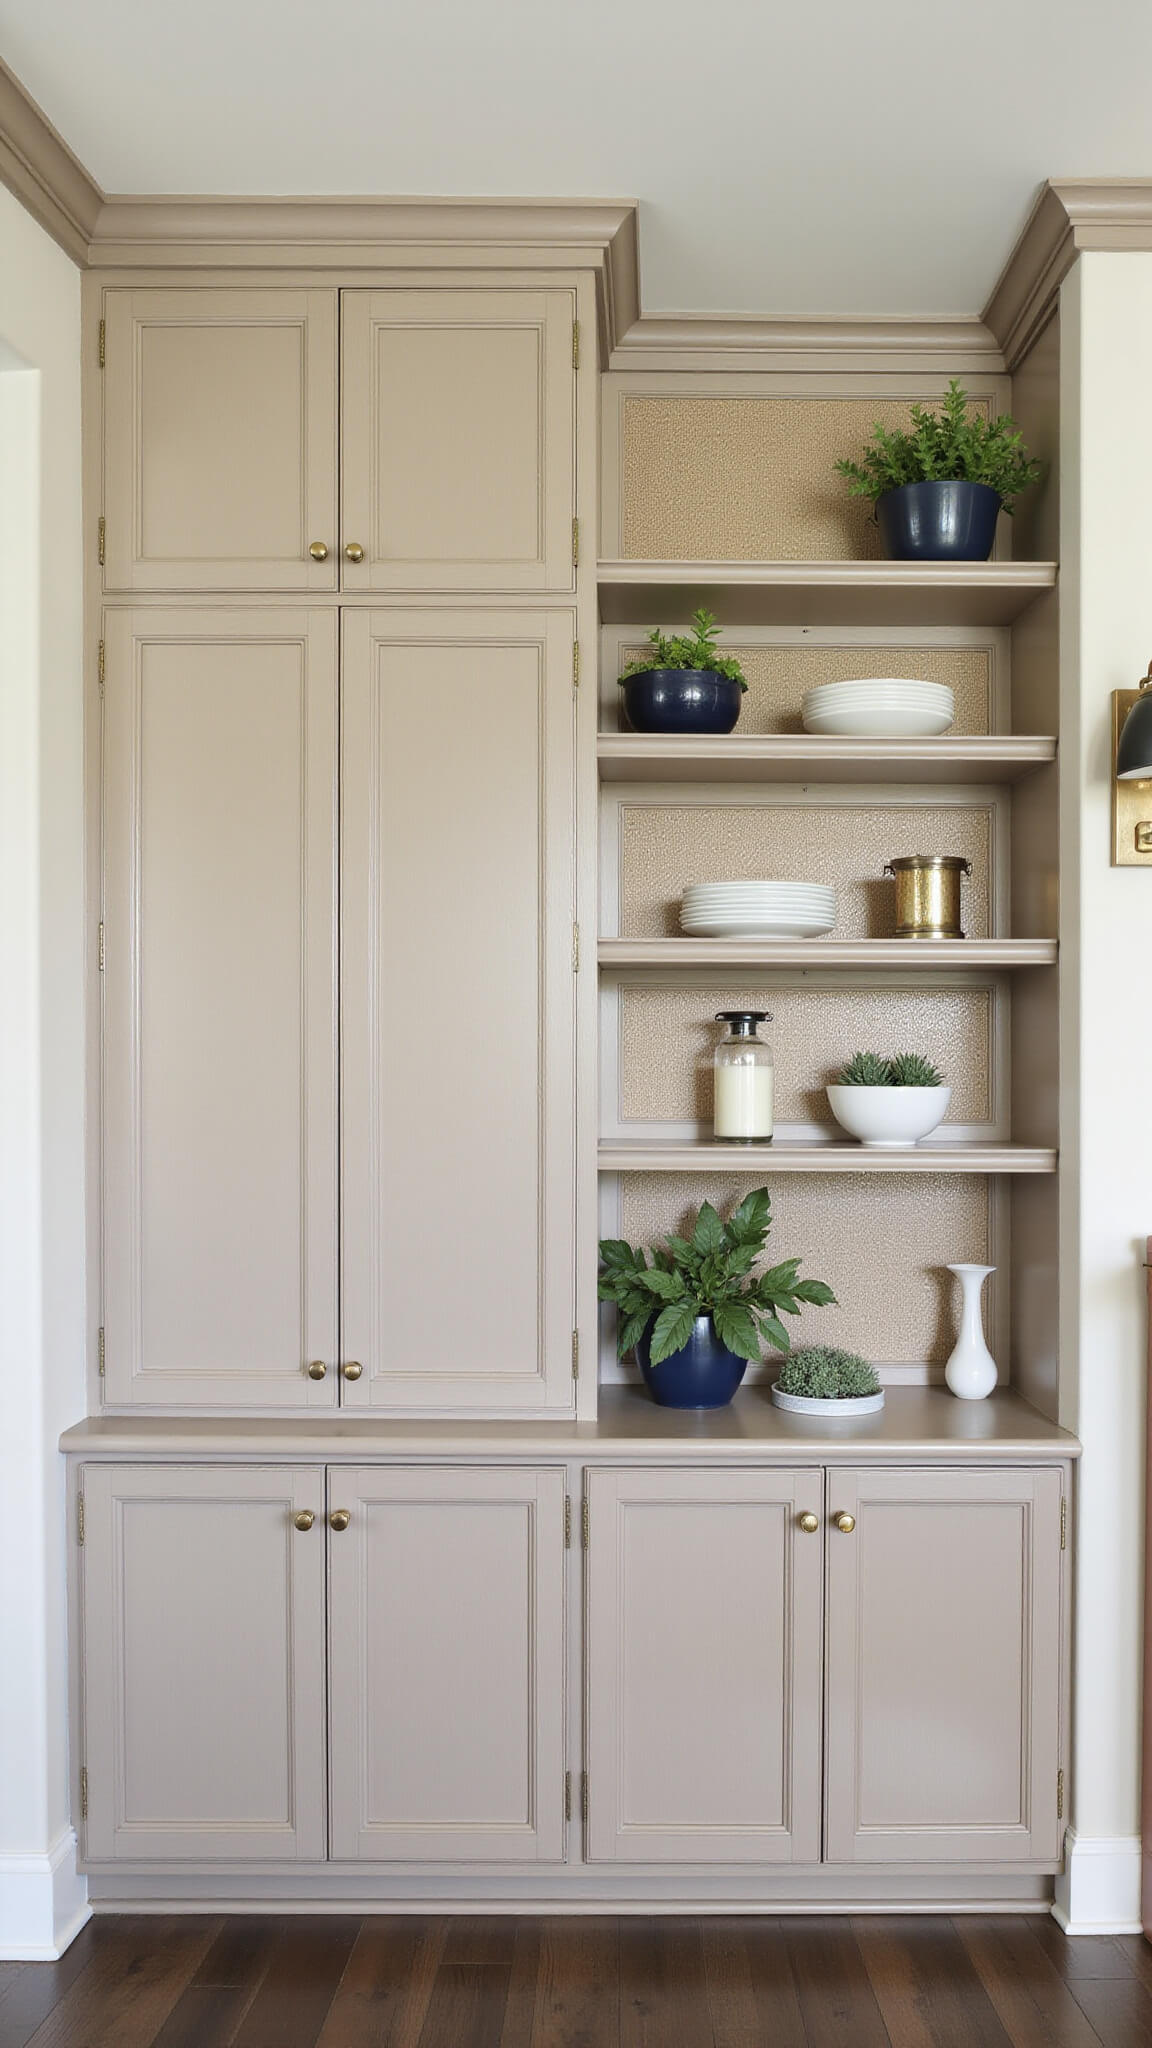
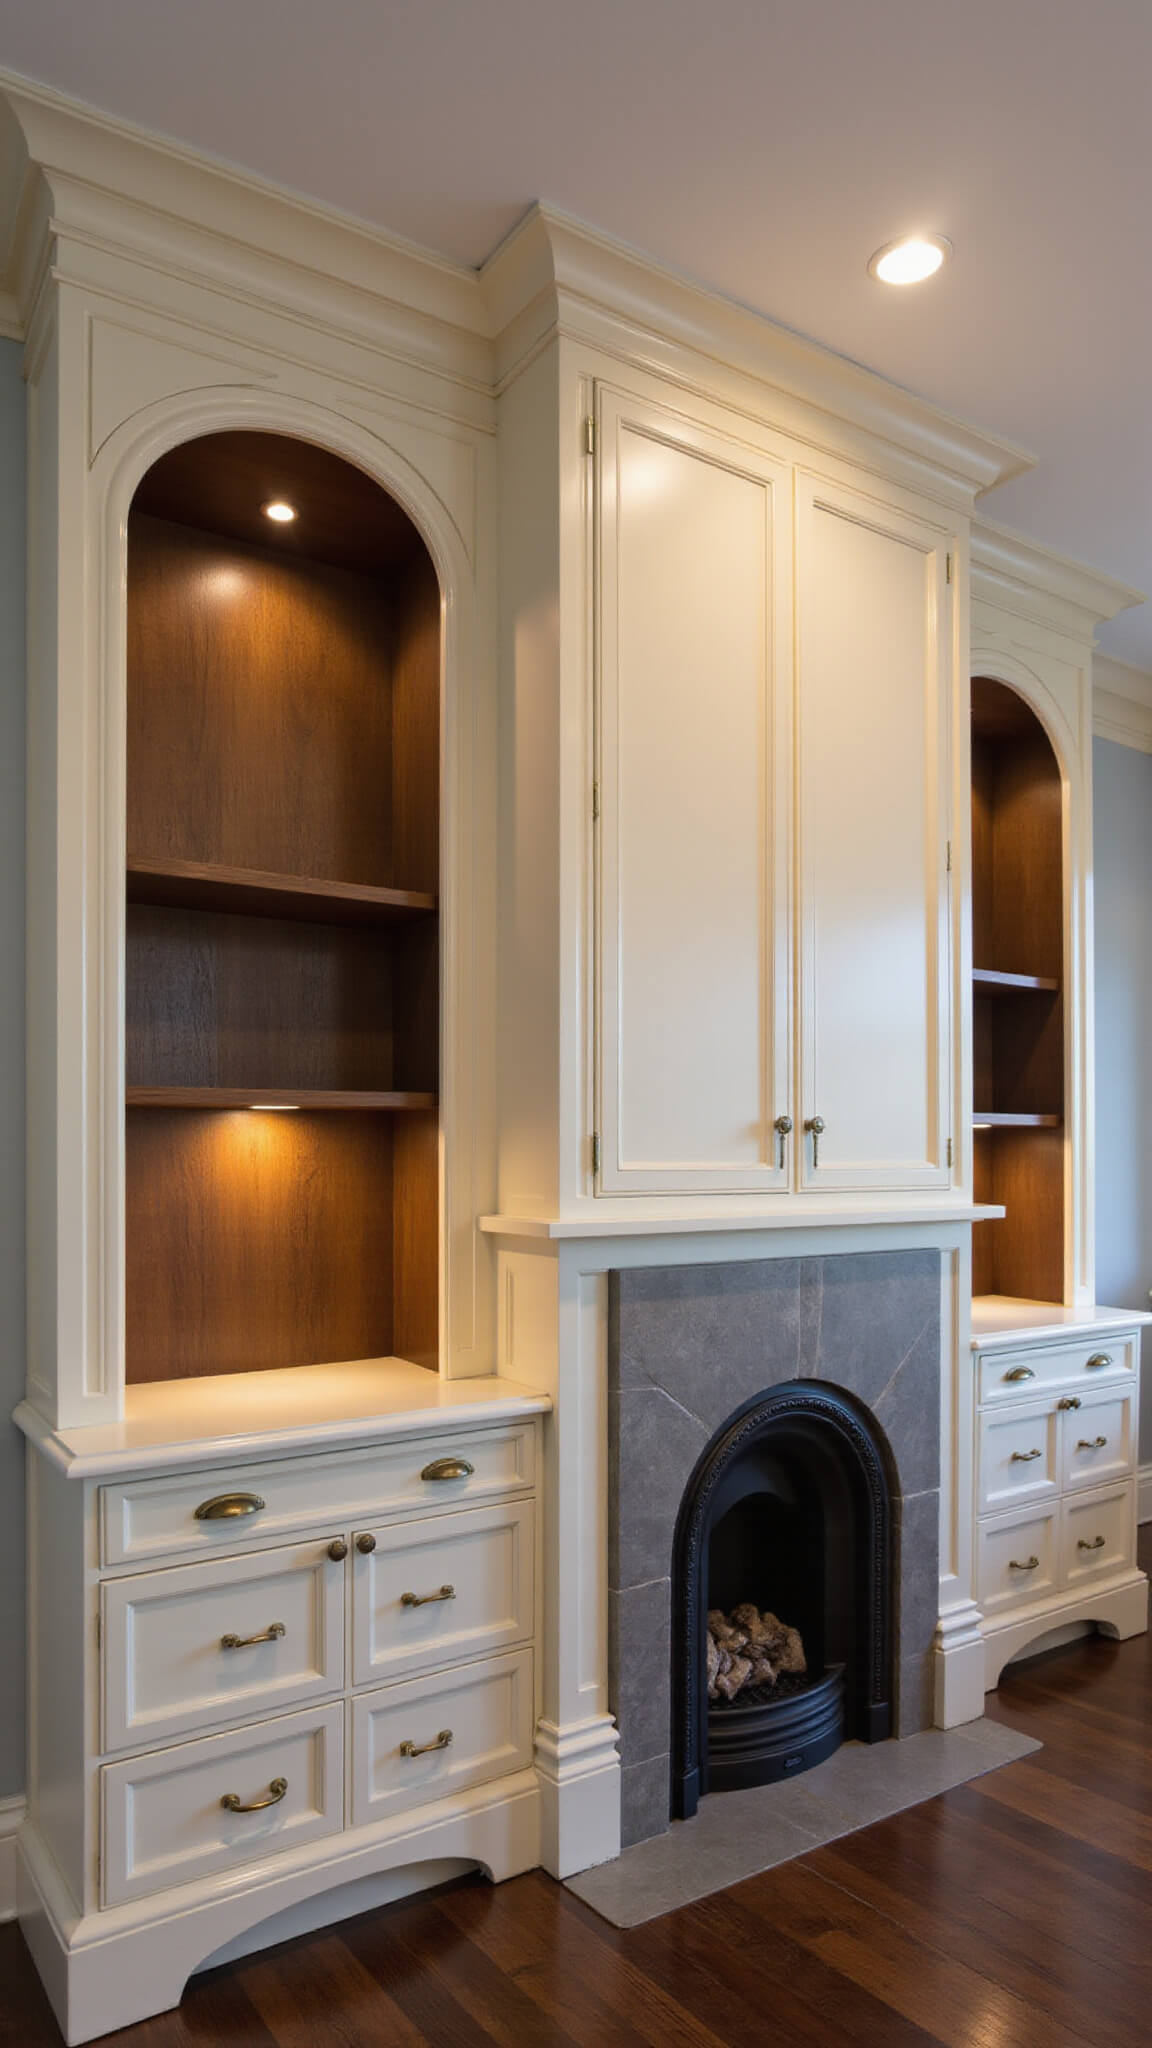
Transitional Built-Ins
- Combines traditional cabinet faces with contemporary hardware
- Neutral color palette with subtle accent colors
- Mix of open and closed storage
- Textured elements like grasscloth backing
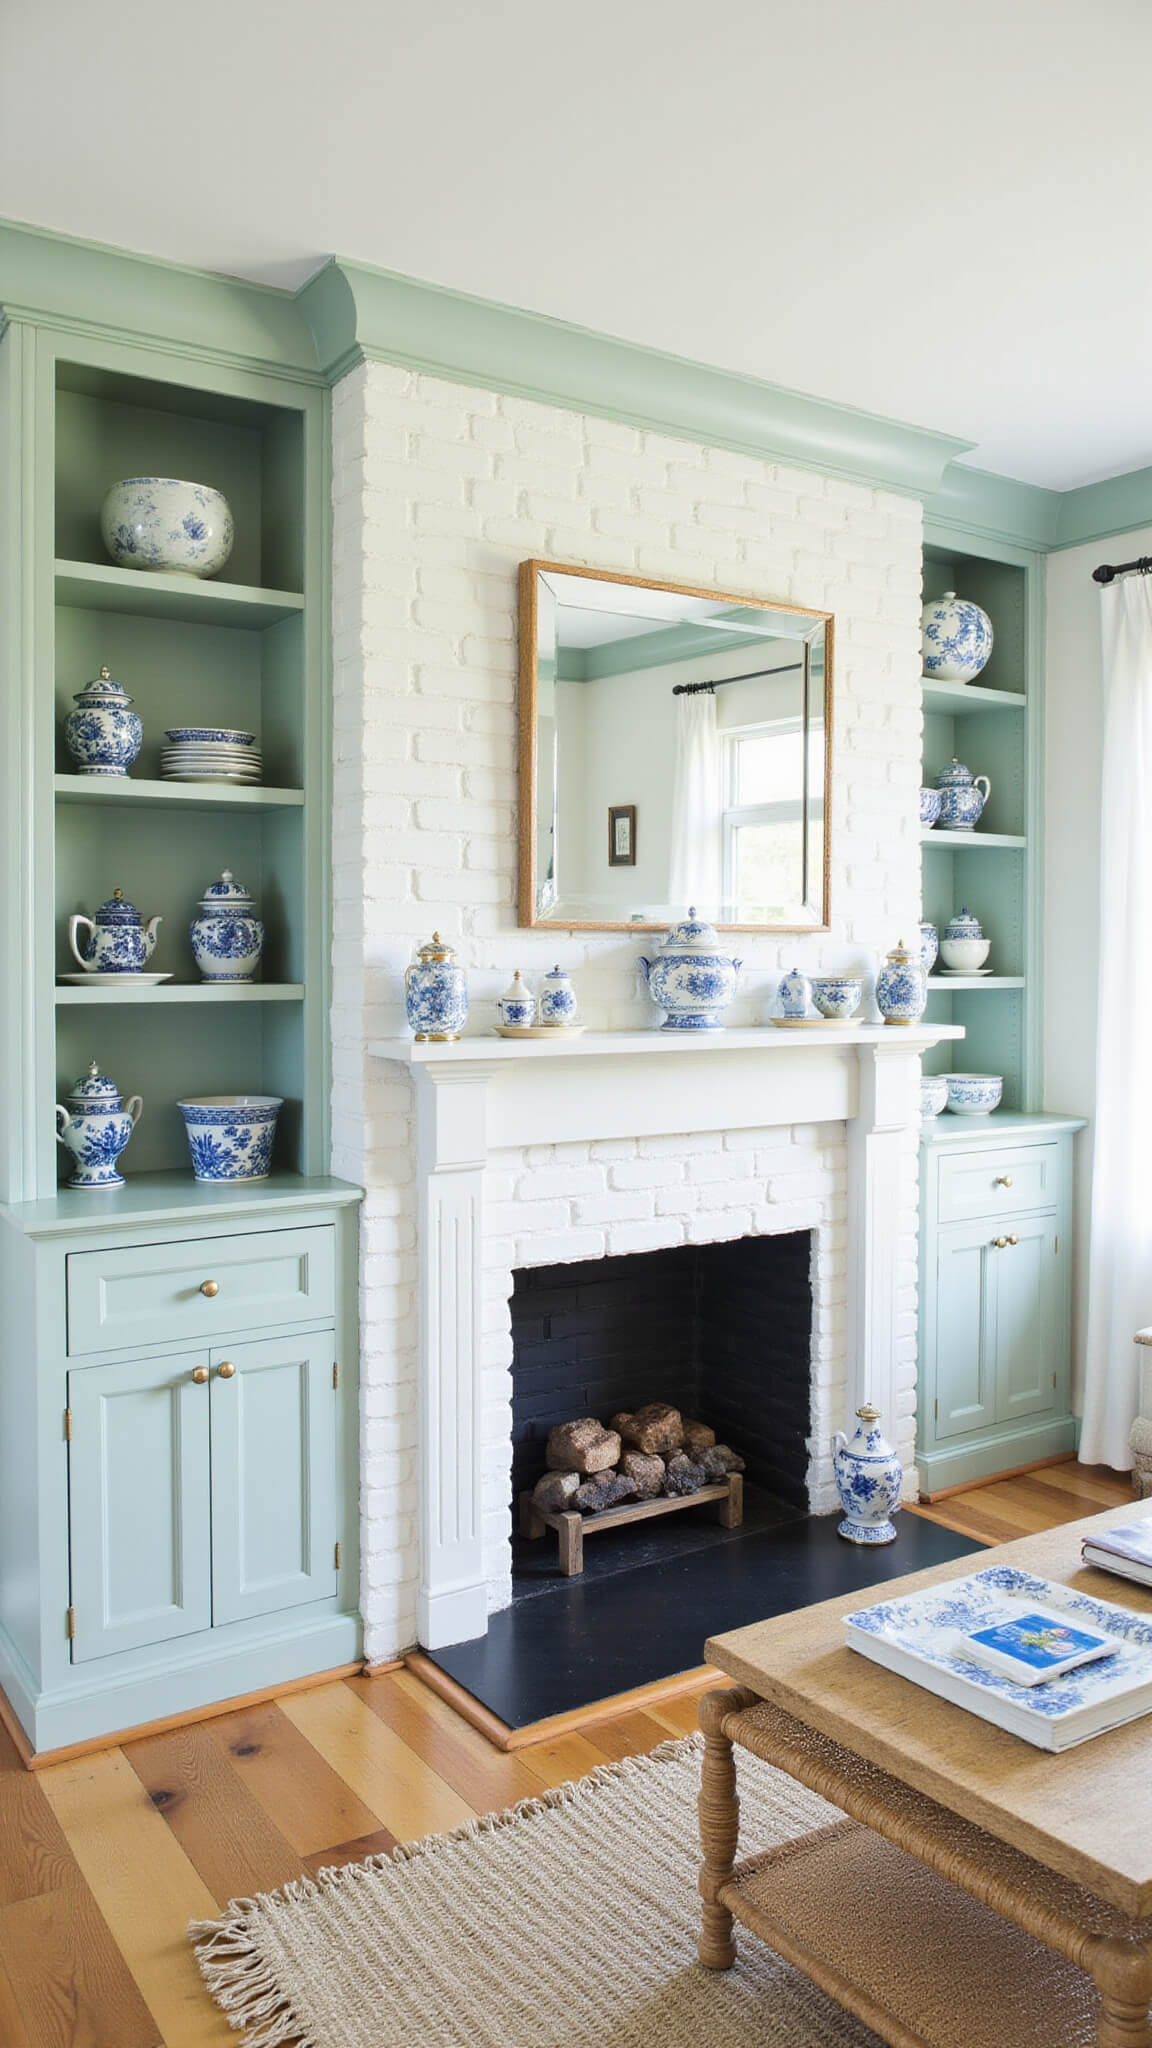
Coastal Built-Ins
- Light blue or seafoam green painted cabinets
- Beadboard details
- Glass-front cabinets
- Natural rattan or rope accents
Project Planning: Setting Yourself Up for Success
Before you grab a hammer or head to IKEA, here’s what you need to plan:
- Measure your space thoroughly
- Height from floor to ceiling
- Width on each side of fireplace
- Depth available (standard is 12-16 inches)
- Consider your storage needs
- Books, media, and display items
- Hidden storage for kids’ toys or electronics
- Specialized storage (wine racks, file drawers)
- Decide on your DIY approach
- Full DIY (building from scratch)
- Semi-DIY (IKEA hack)
- Hiring professionals
The IKEA Billy Bookcase Hack: Budget-Friendly Built-Ins
Materials Needed:
- Billy bookcases (width depends on your space)
- MDF boards for trim
- Crown molding
- Base molding
- Wood filler
- Primer
- Paint
- Hardware (if adding cabinet doors)
Step-by-Step Process:
- Assemble Billy bookcases according to instructions
- Remove baseboards where bookcases will go
- Secure bookcases to wall with provided brackets
- Add MDF trim to fronts to create built-in look
- Install crown molding at ceiling junction
- Add base molding to match existing baseboards
- Fill seams and screw holes with wood filler
- Sand smooth, prime, and paint entire unit
- Add cabinet doors if desired (IKEA sells compatible options)
Pro Tip: Remove the thin backing that comes with Billy bookcases and replace with shiplap or beadboard for a more custom look!
Mid-Range Option: Semi-Custom Built-Ins
What Makes Them “Semi-Custom”:
- Stock cabinet bases with custom shelving
- Standard sizes but with your choice of finishes
- Mix of ready-made and custom components
Best Sources:
- Local cabinet shops
- Home improvement stores’ custom cabinet departments
- Online semi-custom cabinet companies
Design Features Worth the Splurge:
- Cabinet doors with glass inserts
- Integrated lighting
- Pull-out drawers
- Adjustable shelving
High-End Option: Full Custom Built-Ins
Luxury Features:
- Floor-to-ceiling designs
- Curved or arched details
- Premium hardwoods
- Hand-distressed finishes
- Hidden doors or compartments
- Integrated electronics
Finding the Right Craftsperson:
- Ask for portfolio examples specifically of fireplace built-ins
- Check references from past clients
- Request detailed quotes including timeline and materials
- Review their construction methods (dovetail joints, solid wood vs. veneer)
Styling Your Fireplace Built-Ins
The Rule of Thirds